So back in March, we decided we wanted to have backyard chickens. Well I have thought about having them for a while but thought it might be down the road. I had read some articles about how relatively low maintenance they are and to be able to have organic free range eggs without paying $8/dozen would be awesome. I also know several people who have backyard chickens and since I have some friends willing to help when and if I need it (especially when we are out of town), we started planning. So I began looking at coop plans to see what kind of coop Ken could easily build for the backyard. Of course, it had to look nice since I have to look at it every day and it needed to give the chickens lots of space and be secure from predators. I wanted it to be roomy enough for 6 chickens, even though we can technically only have 5. Extra space makes the chickens happy, and happy chickens lay lots of eggs! It also reduces the risks for diseases and bugs, and who wants those?
In my search for coop plans, I found
this amazing coop on Williams Sonoma's website and instantly knew I wanted our coop to look like it. I pulled out some graphing paper and set to work reverse engineering the coop from the photos and making adjustments based on measurement guidelines for coops I had read about in several books.
Here are my initial plans:
 |
| Exterior |
 |
| Frame |
 |
| Interior, Poop Drawer |
 |
| Pen |
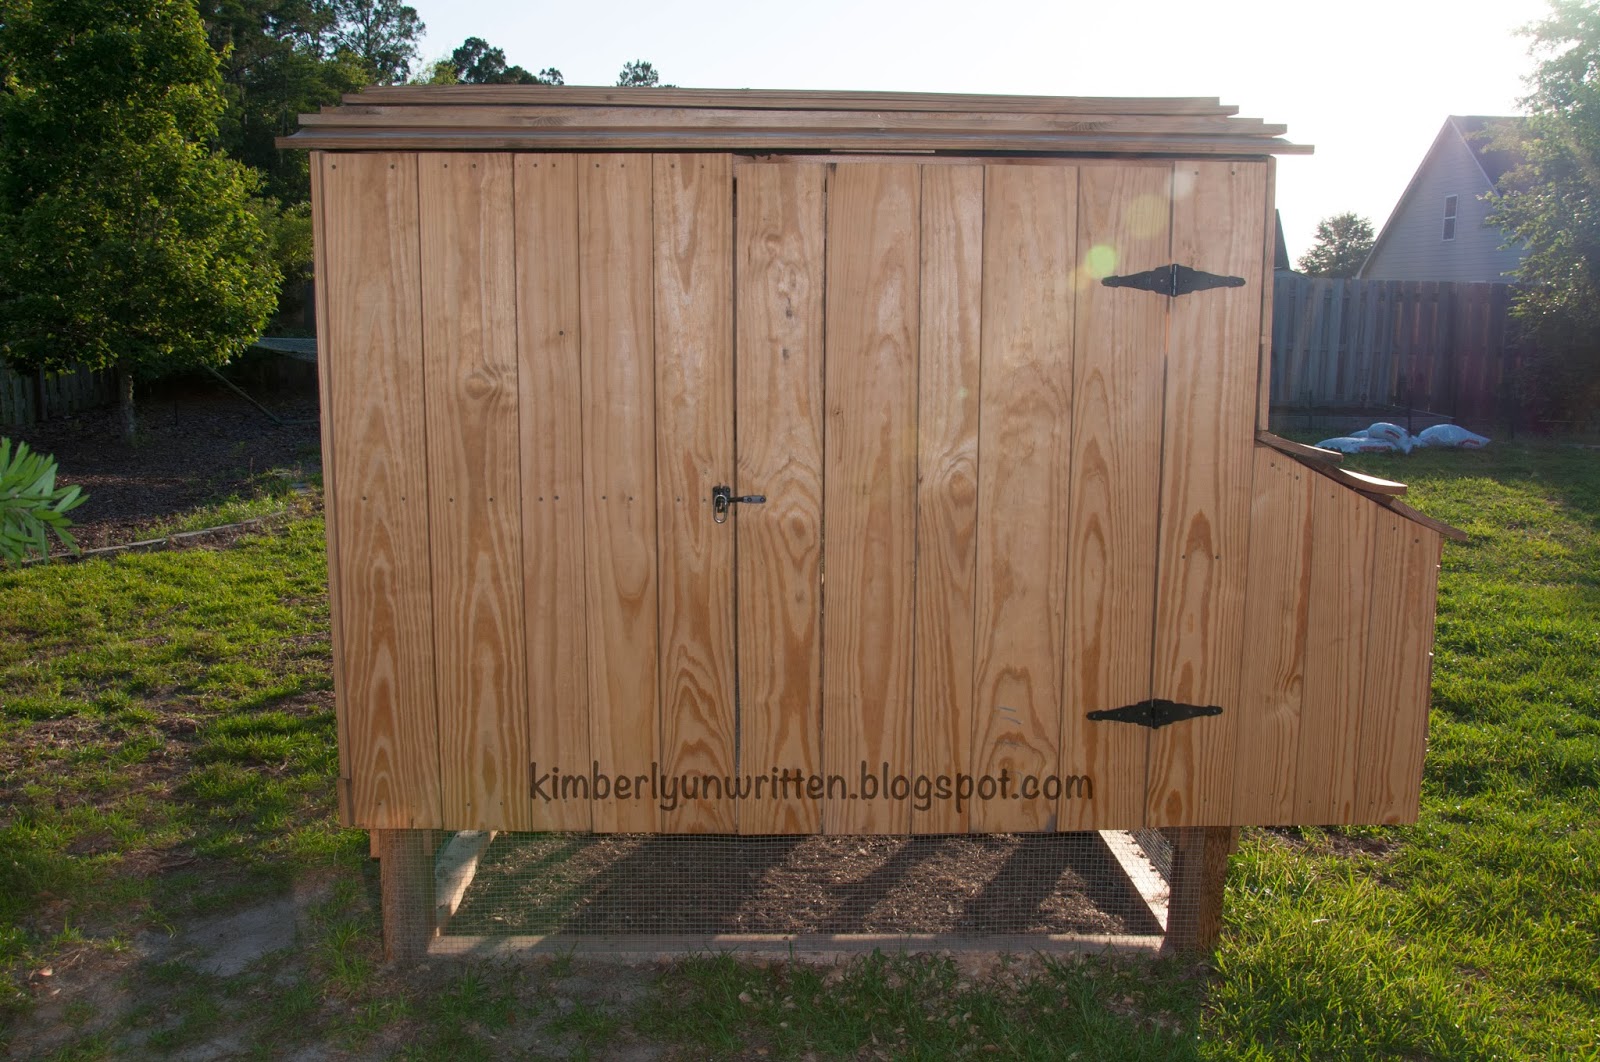
Whatever you do, if you are wanting to recreate this coop, DO NOT follow these plans exactly as they are written above. Ken measured as he went and adjusted as needed due to discrepancies with wood pieces, like for instance I didn't realize that 1x8s are not actually 8 inches wide (boo!). We also had to shorten the legs of the coop because it isn't supposed to be seen from the road, so this also affected the ramp from the coop to the pen. I also decided after drawing up the plans to put a solid roof on the pen to provide shade for the chickens when I can't let them free range in the yard. I will try to point out most of the changes we made (or at least as much as I can remember since this was built in May and it's now November as I am finally getting around to writing this post).
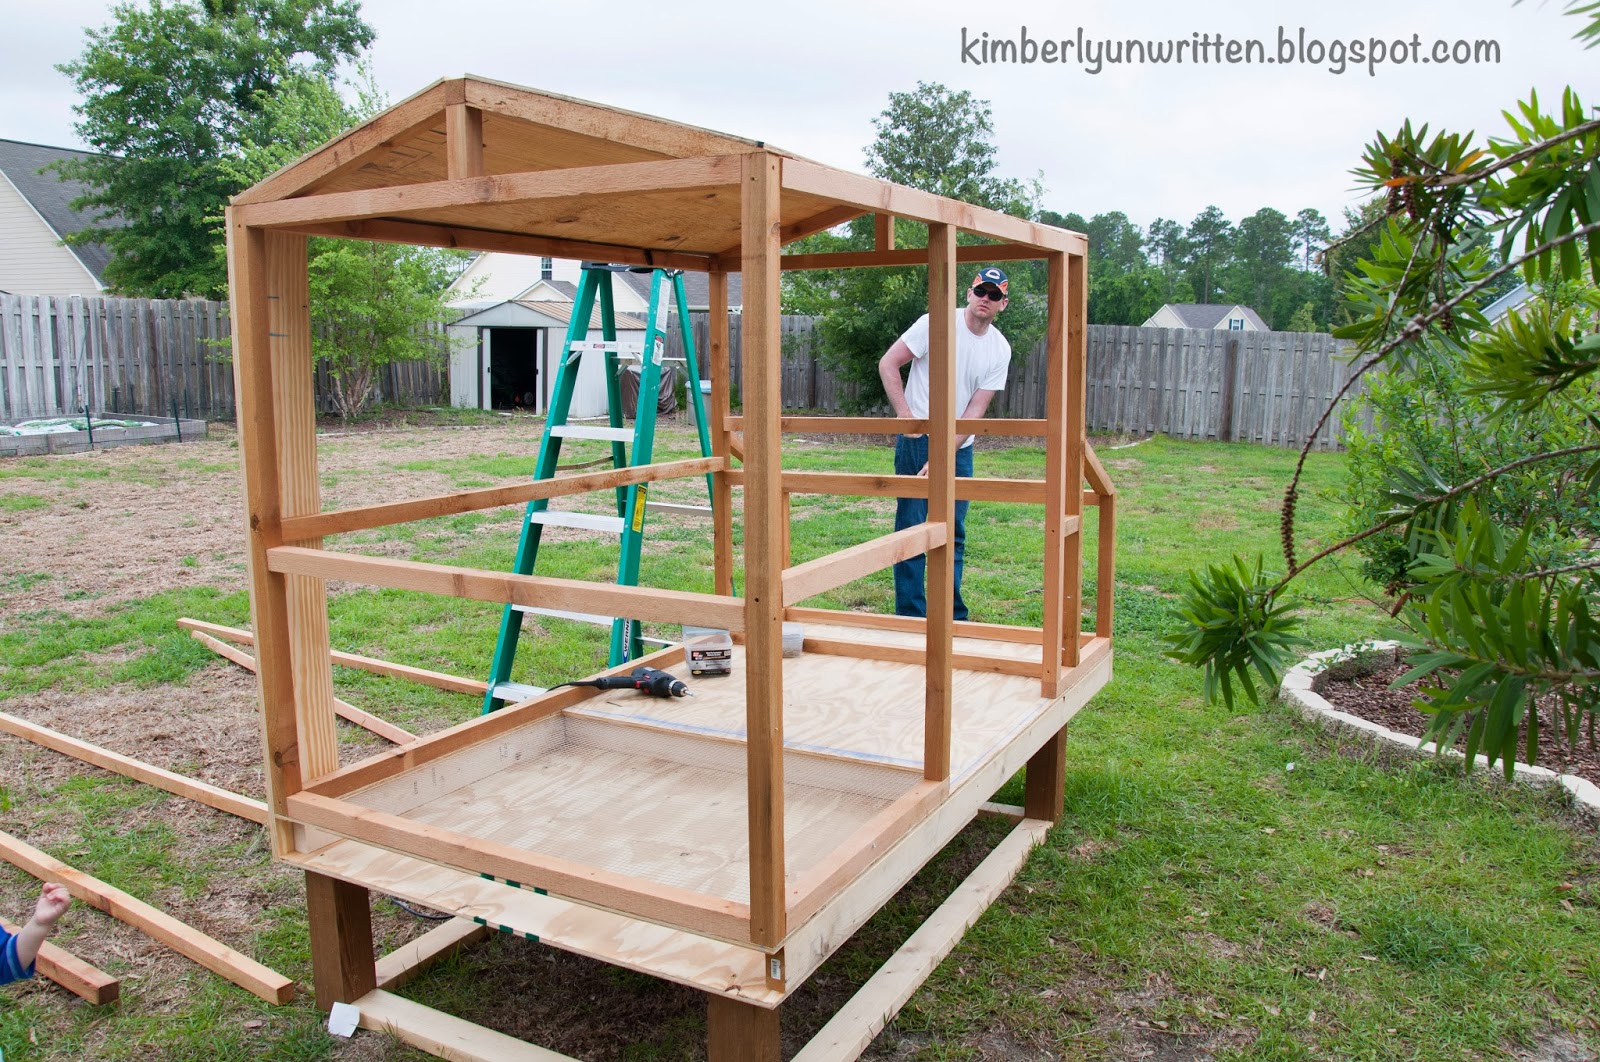
Here are the pictures taken throughout the building process:
 |
| Underside of coop floor |
 |
| Coop floor on legs |
Here's one of the changes we made, or rather added. The roof boards were bowing down a little so Ken added extra support beams across the top, which ended up working out really well as we used the one closest to the door to hang the feeder (notice the eye screw).
 |
| Pop Door |
 |
| We actually changed out this twine for some strong fishing line because the twine was shredding as we tried opening the pop door and it rubbed against the wood. |
 |
| Nest Boxes: lined with shelf lining to make any egg break messes easier to clean |
 |
| We cut plexiglass pieces that can slide over the windows for inclement weather (tropical storms and the like) and to reduce drafts in winter. |
 |
| We added hooks on the door to hang a couple of cleaning tools and used some extra 1x8s to cover the gaps inside above the nest boxes. |
 |
| Here we added a 1x8 up against the 2x2 on the floor separating the poop drawer from the rest of the floor to help keep the bedding from piling up in the drawer. |
 |
| Our first batch of chicks! They were straight run from a friend and we ended up with only one hen! So we traded back two of the cockerels for laying hens and all four cockerels became dinner. |
 |
| These babies were ordered online so they are for sure females. They are super sweet (the black one is my favorite). |
We used untreated pine for the majority of the structure and the frame is cedar. I still want to paint a chicken on the door of the coop but am waiting for it to have a year of weathering before I paint it. If we had more time, it would be a good idea to paint the outside so that it has some weather protection. We had some issues with warping and expansion/retraction in the beginning but it seems to have calmed down a bit. The nest box access flap has given me the most trouble and has bowed out so much that we had to move the latch from the side to the top and it doesn't close all the way, though it's enough to keep critters out. It would have been fine if we had planned for the lack of width of the 1x8s that caused the panels not to meet up at the corner. We plan to repanel the nest box area to fix this problem. I think that's about it. Chickens are really pretty easy to keep, a little more work than having a cat and you get eggs in return!